- Created by Martin Moghadam, last modified on Jun 29, 2020
You are viewing an old version of this page. View the current version.
Compare with Current View Page History
« Previous Version 30 Next »
This section in only applies to PerformanceGuard Server 8.1 or Newer
Before you install PerformanceGuard server software, make sure that you know the hardware recommendations and software requirements.
You can only install PerformanceGuard server software on computers/servers with 64-bit Windows operating systems.
Important Prerequisites
- A computer/server with:
- a 64-bit Microsoft Windows operating system (view supported Windows versions)
- Microsoft .NET Framework 4.6 or newer
PerformanceGuard 7.5 and newer uses OpenJDK included in the installation file
For PerformanceGuard versions 7.4 or older you must install Java JDK 8 update 181 or later(see Install Java JDK)
- Administrative rights on the computer that you are going to perform the installation on (local administrator).
A Microsoft SQL Server (MS SQL Server 2012 or newer, either on the same computer as PerformanceGuard or on a dedicated server).
Can I use SQL Server Express?SQL Server Express is only suitable for very small PerformanceGuard installations (less than 100 users) because SQL Server Express has an upper limit on its database size.
PerformanceGuard doesn't itself use SQL Server Enterprise features, but you may use them in case you want to exploit more memory on large installations.
- During installation you'll get the option of authenticating service access to the PerformanceGuard databases through the Windows credentials of one or more existing Active Directory users. If you intend to use that option, make sure that the relevant user accounts have been set up in Active Directory.
- During installation you'll specify the user accounts that will run the various components of PerformanceGuard. If you are going to use Windows authentication (see the previous item), it is important that the user accounts have:
- Full access to the folder in which you'll install the component in question
- Full access to the Windows registry on the computer in question
- Download the PerformanceGuard installer. Download the PerformanceGuard installer from CapaSystems wiki.
A New Installation
See Upgrade Version 8.1 or Newer for how to upgrade an existing installation
Download the Current Release of Performance Guard
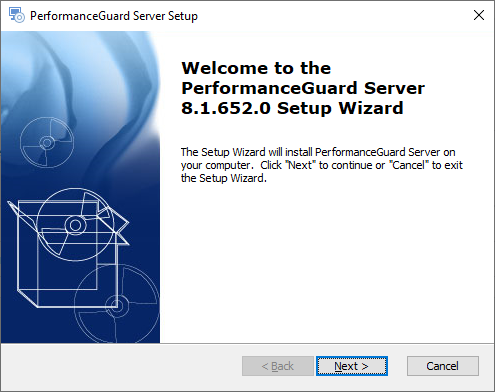
Step 1: Run the installer PerformanceGuardServer.exe
Follow the wizard
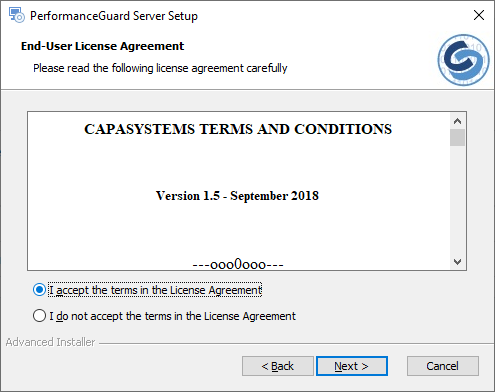
Step 2: Accept the End-User License Agreement
Step 3: Select the components to install
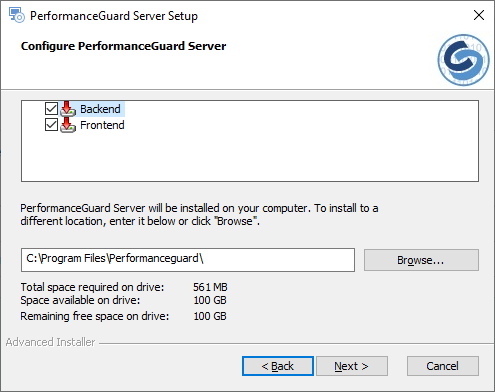
Select the component you want to install:
- Backend
- Contains the backend data aggregation service and the Display services (The GUI)
- Frontend
- Contain the frontend service that agents connect to
Then select the location at which you want to install PerformanceGuard. (Defaullt path is Program Files)
You should install all of the components. Most users simply install all of the components on the same computer, but in some environments it can make sense to install the Frontend server, Backend server and PerformanceGuard web interface on separate computers to achieve optimal performance. If required, you can even install more than one Frontend server to distribute the load. See Multiple Frontend Servers
Step 4: Create Backend Database
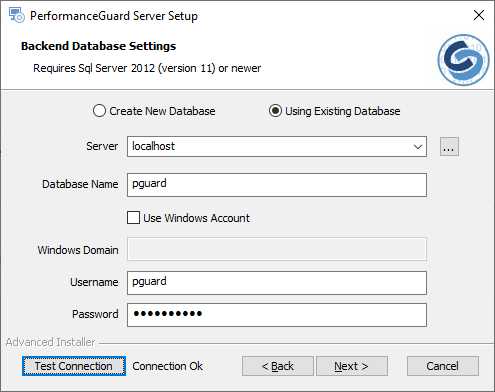
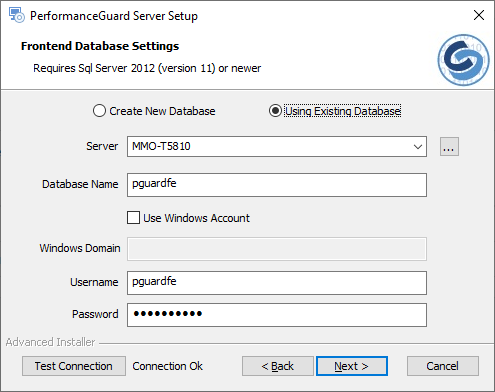
Server: Which server should run the Backend server database? If the SQL Server that you want to use exists on the computer that you are installing the Backend server on, simply use the localhost default setting. If you have another SQL Server on your network, and you want to install the Backend server's database on that server, click the browse button next to the field and select the required SQL Server.
If your SQL server uses another port than the default port 1433, you can add the port number after the server address. Example: localhost:6789
If you want to use a particular instance on your SQL Server, you can add the instance name after the server address, separated by a backslash. You can also combine instance and port information if required. Examples: localhost\instance or localhost\instance:6789
- Database Name: The name of the Backend server database. The name is normally pguard, but you can change that if required.
- Use Windows Account enable if you want to use a Windows Active Directory User
- Windows domain (only relevant if you selected Windows Account): Specify the domain that the Active Directory user belongs to.
- Username: In order to communicate with the Backend database, PerformanceGuard needs access to the database with a user account.
- If using SQL Server authentication the name of that user account is normally pguard, but you can change the name if required.
- If you use Windows authentication, you must specify the user name of an existing Active Directory user.
- Password: Specify the password that PerformanceGuard should use when it accesses the Backend server database with the user account that you specified previously.
If you use SQL Server authentication, the password must follow the password policy for the SQL Server that you use.
If using Windows authentication specify the password of the Active Directory user.
View Microsoft's SQL Server password policies (link applies for SQL Server 2012, but you can select other SQL Server versions on the page).
Step 5: Backend SQL Server
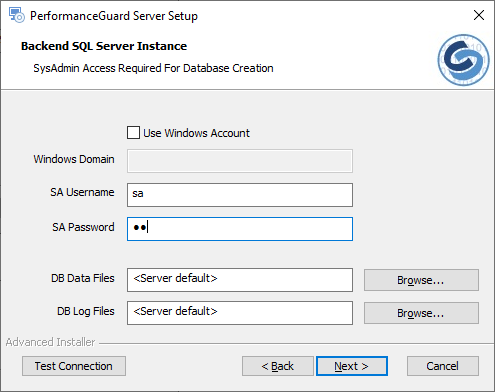
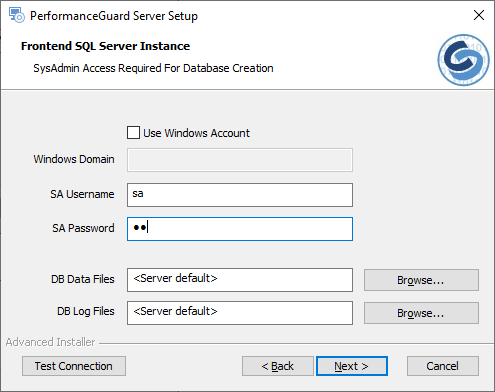
Determines whether you want to let the PerformanceGuard installer create the Backend server database for you automatically (recommended). If you select this option, you must provide system administrator credentials for the selected SQL Server in the following fields.
This must be a different user than the backend database user that you specified previously.
- If using SQL Server authentication the name of that account is normally sa, but you can change the name if required.
- If using Windows authentication you must specify the user name of an existing Active Directory user that has system administrator rights on the SQL Server.
- Use Windows Account enable if you want to use a Windows Active Directory User
- Windows domain (only relevant if you selected Windows Account): Specify the domain that the Active Directory user belongs to.
- SA Username: Specify the user name of the SQL Server's system administrator account..
- SA Password: Specify the password of the SQL Server's system administrator account.
Use the Test Connection button to verify that the connection to the database works.
If you don't know the SQL Server's system administrator credentials, you can typically get help from your organizations database administrator (dba).
- DB Data Files Directory Path to store the new Data Files
- DB Log Files Directory Path to store the new Log Files
By default, Backend server database files will be placed at the SQL Server's default location for new databases (<Server default>). That's usually fine, but occasionally it may not be the best choice, for example if you expect to collect a lot of data, but there isn't much available disk space at the default location. That's why you are able to specify your own paths for data files as well as log files.
If you specify your own paths, it's important that they already exist. The PerformanceGuard installer can't create new folders for you.
Step 6: Backend Properties
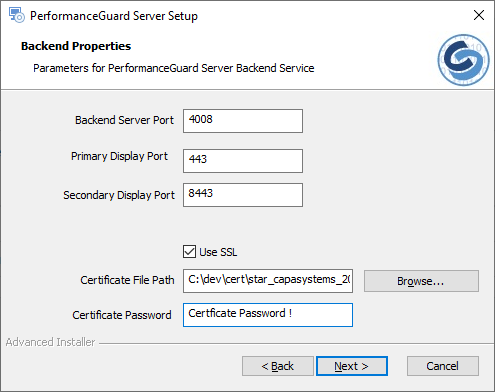
- Backend Server Port: On which TCP port should the Backend server deliver data? We recommend that you use port 4008 unless your organization's firewall administrator has told you to use another port.
Primary Display Port and Secondary Display Port: PerformanceGuard has a web server service that runs the PerformanceGuard web interface. The web server needs to use two TCP ports. Make sure that no other applications use those ports.
When you move on, the installer automatically checks the availability of the ports that you specify.
If you run into problems with port 80, see the troubleshooting article Port 80 Is Used by Another Service.
- Use SSL: enable HTTPS. Change the port numbers to 443 and 8443 and add the Certificate File Path, The path to the certificate file on the local machine and the Certificate Password.
We recommend that you configure the PerformanceGuard web interface to use HTTPS connections, you must acquire a server certificate. Communication between web browsers and the web interface will be encrypted with SSL as well as it will do host authentication. You must install your own server certificate that's signed by a trusted authority (such as VeriSign or Symantec). See SSL Server Certificate for HTTPS.
Step 7: Create Frontend Database
Same as Step 4 but for the Frontend Database
Step 8: Frontend SQL Server
Same as Step 5 but for the Frontend Database
Step 9: Frontend Properties

- Agent Port: On which TCP port should the Frontend server listen for data from agents? We recommend that you use port 4001 unless your organization's firewall administrator has told you to use another port.
- Backend Server Hostname: Your Frontend server is going to regularly communicate with the PerformanceGuard Backend server. That's why you must specify where the Frontend server will be able to find the Backend server. If you are installing everything on the same computer, simply use the localhost default setting. If the Backend server is going to be installed on another computer, specify the hostname or IP address of that computer.
Agent Encryption Key (optional): The AES key ensures a secure communication between PG Agent(s) and Frontend. Therefore it is recommended to specify an AES key, which you created when you installed the agents, otherwise the communication will be less secured. Click Generate to Create a Key.
Remember to store the key. The agent encryption key is necessary when installing the agent.
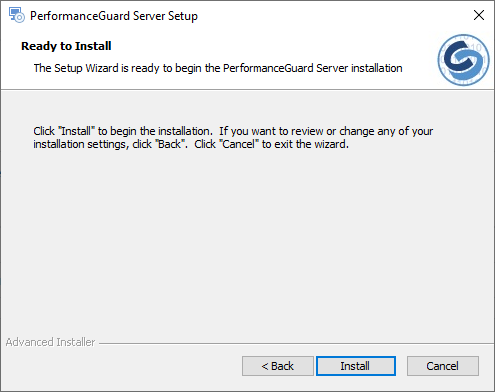
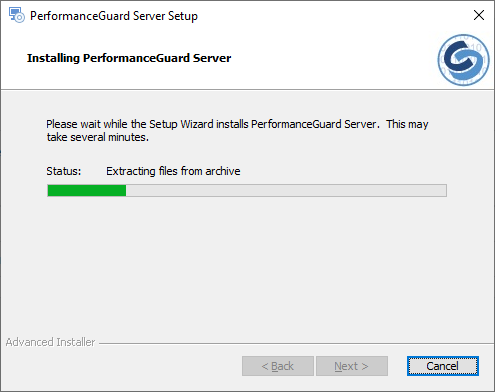
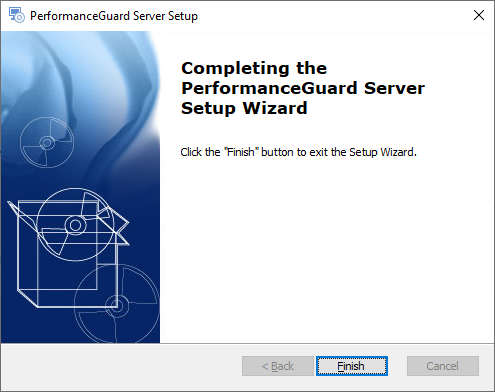
Step 10: Install
Click Install
Installation Troubleshooting
If something goes wrong during your installation, you'll see an error message. The error message will typically tell you that:
- the setup wizard ended prematurely, and
- that your system has not been modified
The latter is not always true. Your system may in fact have been modified, even if the error message tells you that it hasn't. Sometimes the entire PerformanceGuard system, including databases, may in fact have been installed, but if just a single of the PerformanceGuard services doesn't start after the installation has finished, the error message will appear.
You are therefore often able to solve the problem yourself.
What You Should Do
If something goes wrong during your installation, you should first ask yourself if you have you met all of the prerequisites (see the beginning of this topic). For example, do you have administrative rights, and does the computer have the required version of Java JDK?
Next, you should check your installation log:
- Open your installation log. If you followed the installation procedure in the previous, the log file is called installLog.txt. The log file will be available at the location from which you ran the installation, so if you ran the installation file from C:\, the log file will be placed under C:\ too.
- Search the log for occurrences of return value 3.
- Read the contents of the log file just before occurrences of return value 3 to determine which actions failed during the installation.
In this example (click thumbnail to view image in full size), a search for return value 3 revealed that there were problems with the user account specified for the PerformanceGuard Backend server database:

Going through the installation log as described will nearly always reveal what went wrong. In many cases you can solve the problem yourself. For instance, the problem identified in the example was solved simply by specifying the correct password for the Backend server database.
If you need help from PerformanceGuard support, you can find information about your support options on the CapaSystems website, http://www.capasystems.com/.
Search this documentation
On this page
In this section
- No labels